Tuesday, October 2, 2012

OPI Pink of Hearts 2012 Swatches and Review!

Good morning my fellow lacquered lovers!  Happy Tuesday!  As you may know, October is Breast Cancer Awareness Month.  While I have been fortunate enough that my family has not been personally affected by Breast Cancer, it's a disease that afflicts many women and is important to highlight.  Whether we are personally affected by a disease or not, I think it's important to recognize them and fight for a cure.  Each year, many brands release Breast Cancer Awareness nail polishes and OPI is at the forefront of that.  This year OPI is set to donate $25,000 in the US and $5,000 in Canada.  Now, without further ado, on to the polish!

 Above:  OPI Pink of Hearts 2012 Packaging


 Above:  2 coats of I Think in Pink

I think in pink is a light pink sheer jelly polish.  As you can see, it's not fully opaque in 2 coats but would probably even out in three.  This would be a great jelly polish to try a jelly sandwich with!   The formula is a bit thick so you want to wait a few minutes between coats to avoid dragging.


Above:  2 coats of You Glitter Be Good To Me

You Glitter Be Good To Me is small light pink micro glitter packed with larger, dark pink hexagonal glitter.  I love how the two glitters together really compliment each other!  Plus, there was so much glitter that with two coats, it was practically opaque!


Above:  2 coats of I Think in Pink with 1 coat of You Glitter Be Good To Me

Lastly, I wanted to show you these two together because they are so cute as a set!  The pinks really compliment each other and I love how just one coat of You Glitter Be Good To Me is so sparkly!


All in all this is is a great collection for a great cause.  I just love how sparkly You Glitter Be Good To Me is!  Whether Breast Cancer has affected you personally or not, approximately 1 in 8 women will be afflicted by this disease so it's important we find a cure and I'm so happy to see the beauty industry helping to raise awareness.  The OPI Pink of Hearts Collection is available wherever OPI is sold for $14.95 per pack.

What did you think of these polishes?  Must have?  Any Dupes?

The products in this post were sent to me for my unbiased review. Please see my disclosure policy for more information.

Monday, October 1, 2012

GlitterDaze A Charmed Halloween Collection Swatches and Review!

Good evening my fellow lacquered lovers!  Happy Monday to you all!  I hope you all had a nice, relaxing weekend like I did!  Tonight, I have my first Halloween Collection of the year to show you!


Above are all macro bottle shots of the GlitterDaze A Charmed Halloween collection.  I have to admit, I got super excited when I saw this collection because I was the biggest Charmed dork back in the day. I think I just love Shannon Doherty and magic!  Now, without further ado, on to the polish!


Above  3 coats of Book of Shadows

First up we have Book of Shadows, described by GlitterDaze as a leathery brown "crelly" (hybrid of a creme and a jelly.  I have to admit that is pretty spot on!  This is a light milk chocolate brown full of gold and broke glitter in hexagons, squares and shards.  This color just screams Autumn to me!  The formula was pretty good, I had full opacity at 3 thin coats and didn't have to hunt for glitter!


Above:  3 coats of My White Lighter

I'm an idiot and didn't realize this polish was glow in the dark until I just read it in the description!  I promise glowing pictures to come soon!  My White Lighter is a light blue creme base full of 3 different sized sky blue glitter.  It's so dainty and pretty looking!  I did find that the formula on this one was fairly thick and definitely needs a few drops of nail polish thinner.


Above  3 coats of Source of All Evil

Hands down, this is my favorite polish of this collection!  Source of All Evil is a black jelly full of orange, green and purple small hexagonal glitters and iridescent shards!  The shards make it so fun and sparkly!  The formula on this one was good, three thin coats had it mostly opaque and you can easily layer this over black for maximum effect!


Above:  3 coats of The Charmed Ones

The Charmed Ones is a medium grey jelly polish full of blue, silver and black glitters in different sizes as well as some iridescent shards.  I love the different glitters in this one!  It reminds me of Winter in NYC for some reason.  The formula was good, mostly opaque in 3 coats however I'd probably layer it over a grey the next time I wear it.


I wanted to show you some different Halloween looks with The Power of Three above so the orange is NYC Pumpkin and the black is Black Expressionism by Finger Paints.  The Power of Three is all different sized iridescent glitter in a clear base.  This is definitely meant to be a layering polish and I love how completely different it looks over the bright orange and pure black!  The formula was really easy to use and this is just one coat above!


Above:  3 coats of Vanquishing Demons

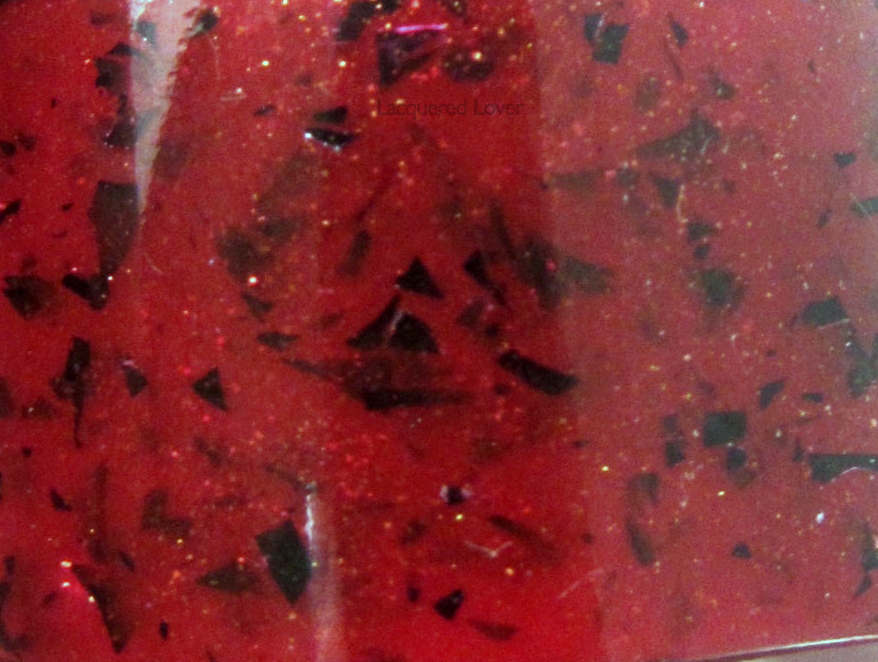
Last but not least is Vanquishing Demons, a true blood red jelly polish full of gold shimmer with small black shards in it!  I love it!  It's so horror movie!  I will definitely be rocking this polish!  The formula was great, seemed thin but built up nicely in three coats.


All in all, I love this collection and the names!  I really like seeing more people getting into shredded glitter and the iridescent shreds in Source of All Evil really got me!  This collection was released today so hurry on over to the GlitterDaze shop and pick up any bottle for $11 for 14ml if you want them for Halloween!


What did you think of these polishes?  Must have?  Any Dupes?

The products in this post were sent to me for my unbiased review. Please see my disclosure policy for more information.

Saturday, September 29, 2012

SoFlaJo Frankie's Lab Dance Swatches and Review!

Good afternoon my fellow lacquered lovers!  Happy Saturday to you all!  I hope you are all having a fabulous weekend so far!  Today, I have one of the new polishes from indie nail polish brand SoFlaJo's Terrified Collection for Halloween!  Now, without further ado, on to the polish!


Above:  2 coats of Frankie's Lab Dance with top coat

Frankie's Lab Dance is an iridescent green with the tiniest flashes of purple and is full of micro glitter in orange, purple and green.  I love how much texture it looks like this polish has!  I'm always a fan of iridescence in polish because I love seeing the subtle purple sheen to it.  The formula was great on this, opaque in two coats but would also look really fun layered over a black!  The glitter does dry rather gritty so I would definitely use a top coat to make it more smooth.


All in all, I love this polish!  And I love that the bow on it says Trick or Treat, it's such adorable packaging!  This polish and the rest of the Terrified Collection is available on SoFlaJo's website for $5 for 5ml or $10 for 15ml!  I definitely want to pick up Purple Reign of Terror and The True Death as well!

What did you think of this polish!  Must have?  Any Dupes?

The products in this post were sent to me for my unbiased review. Please see my disclosure policy for more information.

Friday, September 28, 2012

Butter London Scouse and Swinger Swatches and Review!

Good morning my fellow lacquered lovers!  Happy Friday!  I hope you all have fun plans for the upcoming weekend!  I have no plans this weekend and am actually really happy to just be able to hang out!  Today, I have two really fun nail polishes to show you from Butter London.  Scouse is a Dillard's exclusive nail polish but both are available on Butter London's website.  Now, without further ado, on to the polish!


Above:  3 coats of Scouse

Scouse is a gorgeous deep blue full of purple glass fleck like shimmers.  The purple is much more evident in the bottle than on the nail but it's still a gorgeous shade!  I love the glass fleck finish, it makes the polish have so much depth and dimension to the color.  The formula was a bit thin as glass flecks can be so I used 3 coats to make it fully opaque.


Above:  2 coats of Swinger

Swinger is a gorgeous "grass green glitter" according to Butter London's website and I have to say that's pretty accurate!  I love how there is a ton of tiny green micro glitter to help it achieve more full opacity with slightly larger pieces to make it multi dimensional.  The coverage on this was great, in just two coats it was opaque!

All in all, these are two fabulous shades from Butter London!  I love seeing them experiment with different finishes recently like holographic, more glitters and glass fleck!  Both of these polishes are available at Butter London's website for $14 each through early 2013.


What did you think of these polishes? Any must haves? Any dupes?

The products in this post were sent to me for my unbiased review. Please see my disclosure policy for more information.

Thursday, September 27, 2012

Glitter Gal 3D Holographic Nail Polish in Belgian Chocolate Swatches and Review!

Good morning my fellow lacquered lovers!  Happy Thursday to you all!  I hope you are all having a nice week so far!  Thankfully I'm finally kicking my cold (although I gave it to the boyfriend) but I'm feeling better so back to blogging more regularly!  Today, I have swatches of one of the gorgeous new holographic nail polishes from Glitter Gal, the Australian based company run by two friends.  Now, without further ado, on to the polish!


Above:  2 coats of Belgian Chocolate

Belgian Chocolate is a gorgeous, rich brown with lots of red undertones to it.  I love how this reminds me of a cup of hot chocolate!  The holographic effect is very linear and really looks great against the darkness of the polish.  This is a great way to extend wearing holographic polish into the Fall!  The formula was great, opaque in two coats and just gorgeous!

All in all, I really love this polish!  Usually linear holographic polishes are lighter or brighter polishes but Glitter Gal has a great range of them in darker shades that really makes them stand out.  You can follow Glitter Gal on Facebook or Twitter at GlitterGal_AUS for all of their up to date information!  Their polishes are all 5-free and don't require a top coat so they dry very fast!  Their polishes all come in either 10ml or 15ml sizes.  In the US, you can order from Ninja Polish or Harlow & Co!


What did you think of these polishes? Any must haves? Any dupes?

The products in this post were sent to me for my unbiased review. Please see my disclosure policy for more information.

Wednesday, September 26, 2012

Guest Post by Christopher Box of Hair Extension Geek All About Hair Extensions!!!

Good evening my fellow lacquered lovers!  Happy Wednesday to you all!  Tonight, I have a really special post for you all!  As some of you may have seen, during NYFW I had the very amazing opportunity to get hair extension!  I had met a fabulous stylist, Christopher Box, while backstage at a show in February.  When he was coming back for Fashion Week in September, he asked if I'd like to try out some great tape in hair extensions from Easihair Pro.  Since cutting off my hair last year I've been missing my long locks so I jumped at the chance!  You can read all about my adventure at Lacquered Lover Gets EasiHair Pro Extension for NYFW!  


I absolutely love them!  Since then I've gotten a ton of questions from you guys all across my social media (as well as questions from everyone who has seen me in person) about the extensions.  Who better to tell you about them than the man who did them?  Now, without further ado, I give you Christopher Box!

~~~~~~~~~~~~~~~~~~~~~~~~~~~~~~~~~~~~~~~~~~~~~~~~~~~~~~~~~~~~~~~~~~~~~~~~


I met Carly at NYFW last season behind the scenes of Porter Gray. I was there supporting easihair pro extensions. You wouldn't believe how much extensions are used on the models of Fashion Week!

Carly was super cool and gave me some fab suggestions on restaurants in NYC. We swapped some conversation about her blog and mine: www.hairextensiongeek.com. She gave me her card and when I got back I checked out her blog site: www.lacqueredlover.com. I loved her style and I realized immediately that our sites were very much related. In my opinion, nails are extensions too!

Flash forward to Fally 2012: I was green lighted from easihair pro to do some makeovers on some beauty bloggers while back in town for New York Fashion Week. Carly was the first person that popped into my mind. I knew she would be perfect for easilengths tape hair extensions. 

I got her scheduled and ended up applying the extensions in a teeny tiny tic tac sized hotel room. She was a great sport about the cramped space. I think maybe the wine helped a little. When I got done I was in love with her big sexy hair. She really knows how to carry the look well. A lot of what makes something work is the attitude behind it. 

I realized when I got done doing Carly's hair extension makeover that she probably would be getting lots and lots of questions about her new look. That's why when I got back to Hair Extension Geek Headquarters I went through our archives and put together my top 10 Favorite Hair Extension Blog Posts.

Educational and Entertaining, these posts will give you all the info you need to get your very own hair extension makeover!

Top 10 Best Hair Extension Blog Posts
1. How Much Do Hair Extensions Cost | Part 1: Just how much do they really cost? Find out some basics that will get you pointed in the right direction. It is all about the research.
2. How Much Do Hair Extensions Cost | Part 2: DR Hanson (not Doctor, it is pronounced D like the letter and R like the letter) travels the Route 66 researching just how much exactly do hair extensions cost. He hits up 3 salons and they weigh in on this much debated question.

3. Hair Extension Myths and FactsMove over Big Foot there is a new mythical beast in town. Get the scoop on what is real and what is hype.

4. Sex and Hair Extensions | How to Handle an Intimate Moment with StyleIt is okay to blush. I did when I asked Extension Expert, Jennifer Pompa, to write this. It is well written and is a question that my clients over the years have asked many times.

5.  Bad Hair Extensions | The Tale of Happy Meal BarbieTurns out Barbie doesn't have everything. Have seen her bad pastic wig? A guide on how to avoid her fatal mistake that finally drove Ken away.

6.  Why Your Stylist is Running Late | It’s All Your FaultEver wonder why your stylist is running late? Here is the true story and how to help avoid this situation.

7. The JPompadour Extension Style Tutorial:  What do with your hair once you have extensions in. Styling hair extensions can be a little different than styling your own hair. This is a cool style that marries the pompadour, a braid, and a little bit of messy boho chic.

8. Easilengths Tape in Hair Extensions | A Review: This is the kind of hair extensions that I used on Carly. This video breaks down how the product works.

9.  The Truth about Hair Extensions | The Horror StoryCue the theme from Halloween. Get some popcorn and dim the lights, we are about to go on a journey of some scurry weave ladies.

10. Where Hair Extensions Come From: My personal journey to China with easihairpro. I got to see how hair extensions are manufactured and produced. Be nice, this video is my personal journey and was not intended to be anyting but a rambling mess of fun!

~~~~~~~~~~~~~~~~~~~~~~~~~~~~~~~~~~~~~~~~~~~~~~~~~~~~~~~~~~~~~~~~~~~~~~~~


So what did you guys think?  Would you try tape in hair extensions?

Tuesday, September 25, 2012

Birchbox Color Club Custom Collaboration Swatches and Review!

Good morning my fellow lacquered lovers!  Happy Tuesday!  Just a quick post this morning!  As you may know, the nail polish brand Color Club has been sold on Birchbox for a few months now and they got together to create a special collection!  All of the names are social media related which is so cute!  I was lucky enough to get to go to the Birchbox sample shop during NYFW where we were allowed to pick a few samples and make our very own Birchbox so clearly I got all of the nail polishes!  Also, I'm trying out rounded nails for a bit so here is your first peek at them!  Now, without further ado, on to the polish!


Above:  2 coats of Insta-This

Insta-This is a really fun bright royal blue!  I love how intensely pigmented it is!  It's so bright on the nail, like Nails Inc. Baker Street.  The formula was great, opaque in 2 coats and it didn't stain!


Above:  2 coats of Put a Pin In It

Put a Pin In It is a really pretty rose gold foil.  Unlike other rose gold polishes, you can actually see the pink hint in this one!  I love that it's a warm shade without being a yellow gold.  The formula was great, practically a one coater but I added a second for good measure!


Above:  2 coats of Status Update

Status Update is a deep grey creme that has a lot of green to it.  It's really deep, it almost looks black but has enough grey and green to it to make it not gothic looking.  This is a great fall shade!  The formula was good, opaque in two coats and a lot of pigment.


Above:  3 coats of Tweet Me

Tweet Me is a green based yellow, kind of reminiscent of some of the OPI Shrek colors to me.  Was anyone else expecting the Twitter color to be blue?  That being said, this is definitely a bright color that would work better on someone who isn't as pale as me.  The formula was a bit tricky, I needed three coats to make it even.


All in all, I liked this collection!  I especially liked Insta-This and Put a Pin In It!  For the most part they had a good formula and the names are really cute!  The Birchbox Color Club Custom Collection is available at Birchbox for $8 per bottle.


What did you think of this collection?  Any Must Haves?  Any Dupes?

LinkWithin

Related Posts Plugin for WordPress, Blogger...