Showing posts with label Orly. Show all posts

Monday, July 23, 2012

Lacquered Lover at Cosmoprof Day 1 featuring Orly and China Glaze!

Good morning my fellow lacquered love!  Happy Monday!  I'm checking in today from Sin City as I'm at Cosmoprof in Las Vegas!


I honestly had no idea what to expect walking into a beauty trade show but I'm having an amazing time checking out all sorts of brands, meeting awesome people and especially my fellow bloggers!  I just want to post a few teaser pictures for you this morning but keep checking into my Twitter and Instagram all day today and tomorrow (find me @lacqueredlover) for real time updates!  Now, without further ado, on to the polish!


Orly Electronica Collection featuring 4 gorgeous colors including a duochrome!  Gorgeous!


The new Orly Glam FX Collection!  The glitters are amazing and some of the names are great!  My personal favorite is Cupcakes and Unicorns!


Orly Feel the Vibe neon collection that came out this summer!  It's so bright and fun!


Orly now has magnetic nail polish including three different magnet designs!


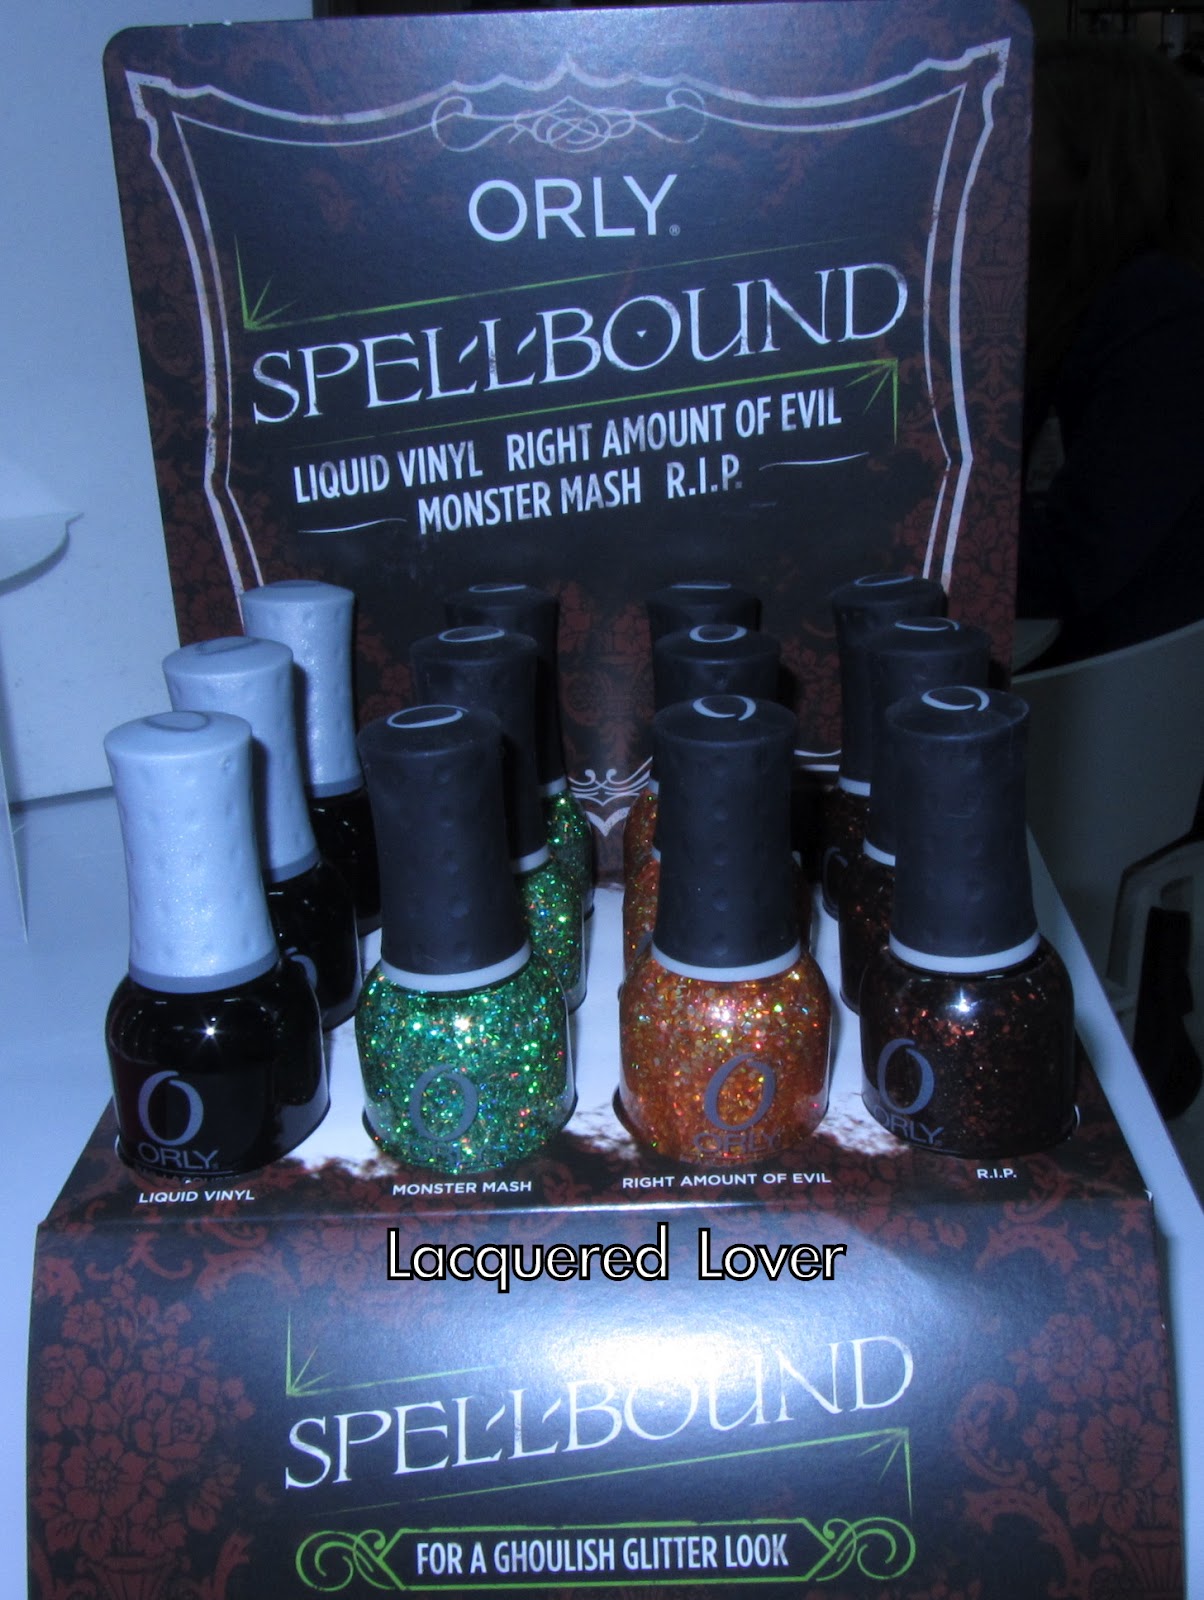
Orly Spellbound Collection for Halloween 2012!  This is great because all of the glitters will be a part of the Glam FX Collection!  My personal favorite is Monster Mash, an amazing bright green glitter with tiny holo glitters!


Orly Fired Up is the Holiday 2012 Collection featuring a number of stunning golds, reds and a rust shade that is so stunning in person!  I will definitely be picking up some of these!


China Glaze Bohemian Collection is 6 gorgeous duochromes that will be released August 1st!  I can't wait to try them because they are seriously gorgeous!


China Glaze Wicked Collection is their Halloween Collection this year.  The three on the left all have gorgeous hidden shimmers to them and the one all the way on the right is just like Luxe and Lush but with glitter instead of flakes!  They will all release a 4 pack including Ghoulish Glow, the glow in the dark top coat!


China Glazes collection to support Breast Cancer this year includes an array of pinks including a glitter!


The China Glaze Magnetix 2 Collection is being released soon and has 6 rich jewel tones that have a higher iron content than Magnetix 1 to make them easier to use!  Also the top magnet is the new one and I can't wait to try the bullseye one!


China Glaze Avant Garden is the Spring 2013 Collection!  It is comprised of both a pastel set and a brighter set all of gorgeous Spring cremes!  I love that there are a lot of blues, purples and even a green to this collection!  This will launch around March 2013.


Last but most certainly not least is the AMAZING China Glaze Hologlam Collection.  Yes, China Glaze is doing holographic polish again and they are incredible!  Gorgeous linear holos!  I will definitely be needing all of these, they are absolutely stunning but be prepared for a bit of a price increase for these!


And here are just some fun pictures!

This is me with Katie from The Painted Nail!  She's such a sweetheart and so tiny and cute!

The view from my hotel room!

The amazing Ardell lashes I got!

This is the man who invented the French Manicure!

All in all, I'm having a fabulous time!  Stay tuned for more coverage!

Wednesday, December 14, 2011

Penguin Manicure Featuring Orly Sweet Peacock!

Good afternoon my fellow lacquered lovers!  Today's post begins with a story.  I love penguins.  I always have.  On our first date that wasn't really a date, my now amazing boyfriend and I went to the Central Park Zoo and had a blast in the penguin house.  The first present he ever bought me was adopting me a penguin and a penguin necklace.  Every few months we go and check in on "our" penguins, so let's just say that penguins are near and dear to my heart.  When I first started doing some nail art, I promised him that at some point, I'd do a penguin for him!  So last night, the day finally came.  And now, without further ado, on to the polish!


PENGUIN!!!  Ok I know he's a little goofy looking, but it was my first try so I'm ok with it!  The base is the gorgeous Orly Sweet Peacock that was another gift from my awesome Secret Santa Anissa and what a stunning blue!  It was practically a one coater but I added a second for good measure but I love the gorgeous blue foil finish!  Then I drew both the penguin outline and the white belly by hand with Sinful Colors Stripers, did the eyes with a dotting tool and drew the beak and feet in gold by hand!  I can't help but smile today as I look down at my goofy little penguin!  I got the idea for the shape of this manicure from the amazing MaD Manis so check it out for a great tutorial!

What do you think?  Are you a penguin fan?  Have you been trying any fun nail art lately?

Tuesday, December 13, 2011

Snowflake Winter Manicure Featuring Zoya Kristen and Orly Royal Navy

Good afternoon my fellow lacquered lovers!  Life in New York has gotten a bit crazy lately between the holiday season that is upon us and my new found efforts to get into graduate school!  So please bear with me if my posting is slightly more sporadic in the upcoming weeks/months.  I am going to continuously be swatching when I can and sharing my nail polishes with you all!  So, since I didn't have time to swatch last weekend, you guys are going to be getting a lot of fun nails of the day and nail art!  Today I will show you my first two attempts at snowflakes that feature two brand new nail polishes!  Now, without further ado, on to the polish!


Snowflakes!  I had so much fun doing this manicure!  This was actually my second attempt at snowflakes, the first I'll show you a bit further down.  Since Zoya has been doing all their flash promotions on their facebook page and twitter, I took advantage of one and got the three grey colors from the new Feel Collection.  What you see above is two coats of Zoya Kristen.  I LOVE this color!  It's a blue based Grey, very similar to Essie Chinchilly but more blue and it's such a gorgeous grey!  I knew I wanted something fun but subtle, so I figured silver snowflakes with my Milani Silver Nail Art Striper would show up a bit but be very pretty.  I was too afraid to try a snowflake on every finger so I only did two on each hand and on the other fingers I used a silver sparkle Sinful Colors nail art striper to make it look like falling snow!  I ended up loving the combination!


This was my first attempt at a snowflake manicure from last week!  I used Orly Royal Navy as the base that I got from a lovely nail polish secret Santa (Hi Anissa!  Thanks again, I love it!)  Royal Navy is a gorgeous deep blue with bright blue shimmer in it that's absolutely stunning!  I can't believe I never had this color before because I am in love with it!  I topped it off with an accent nail of a silver snowflake because it was one of those days that was bitterly cold and it just seemed to fit!

So there you have it.  Snowflake manicures!  I love them!  They are super simple to do and look so pretty!  What do you all think?  Have you tried a snowflake manicure yet?  Would you like to see a tutorial on how to do them?

Monday, November 7, 2011

LACQUERED LOVER 1,000 FOLLOWER GIVEAWAY!!!

Good afternoon my fellow Lacquered Lovers! This post is all about YOU! With all your amazing help, my blog hit 1,000 followers this past Friday! When I started this blog 6 months ago, I never thought I'd be in this position! I wanted to get back into writing (as well as having a reason for justifying my nail polish addiction) and what started off as a fun, creative outlet for me has grown into Lacquered Lover! So, thank you everyone for being so awesome! It truly brightens my day to read your comments and know that you visited my little corner of the internet and enjoyed yourself! So, to honor this momentous occassion, I have a present for you! Two actually!


As you can see, both prizes will be identical for this giveaway! Let's see what each person will win! Since the holidays are fast approaching, everything in this giveaway is winter themed!


Above: From Left to Right: OPI Excuse Moi, OPI Warm & Fozzie


Above: From Left to Right: ORLY Androgynie, Sally Hansen Salon Effects in Winter Funderland


Above: From Left To Right: China Glaze Seasonal Sparkles set including Poinsetta, Twinkle Lights, Holly Day, Snow Globe


Whew! I know it's a lot of pictures but it's a lot of really fun polish! Just my way of saying thanks for making me feel special every day by reading my blog and leaving me comments! I'm trying a new website in order to make this giveaway a bit easier, so let me know if there are any issues! Just fill out the forms below (make sure to leave links if you are doing any extra entries) and that's it! This giveaway will be open until Monday, November 28th, 2011. Good luck everyone and thanks again!

Friday, October 28, 2011

Fun Friday Featuring a Halloween Eyeball Manicure and Tutorial!

Good afternoon my fellow lacquered lovers! As Halloween is quickly approaching, I tried my hand at some Halloween nail art after my spider webs didn't quite come out perfect. My lovely friend Sarah over at the amazing blog Chalkboard Nails (which you should all be following if you aren't!) did an incredible eyeball manicure plus tutorial which you can see HERE. I decided to give it a go and see if I could recreate it so without futher ado, on to the manicure!


Yay! So fun! I actually think it came out super cute! So now, here is my sort of step-by-step version of how to do it (for a more in depth tutorial, check out Sarah's site linked above!)


First I started with a dark red cream for the background. Since I was so excited to do this manicure, I forgot to take a picture of it! The background is Nails Inc. St. Pancras. Then I took my Essie Blanc and with the corner of the brush, dotted white circles onto my nails in a polka dot pattern. I purposely did this while the red was still wet so it would bleed a bit and look like veins. Surprisingly easier than I thought it would be! Then I waited a few minutes to dry before adding the irises.


First I did the brown eyes with Essie Very Structured. I didn't want to choose any colors that were too dark so you would be able to see the black pupils eventually. I tried to put the brown in different lines on each nail so that the colors would be different on each finger.


Next came the blue eyes with Orly Frisky. Can you believe I've had this gorgeous bright blue cream sitting in my untrieds? The horror!


Last was the green eyes for which I used Color Club Twiggie. The only way to describe this shade is a neon mint green. I realize that sounds like an oxymoron but it's the only way to describe it! So after all the colored iris' are put into the eyeballs with the dotting tool, let your creation dry for a bit before going on to the pupils with a smaller dotting tool.


I used a smaller dotting tool to make the pupils. I tried to make them in the middle of the eye but that didn't quite work. Oh well, win some use some. For the pupils, I used my favorite black cream, Wet N Wild Black Creme. Lastly, I waited a few minutes before adding one last little touch:


Using a tiny dotting tool, I added a white dot like in Sarah's pictures to make the eye glow a bit. The dots are all off centered on purpose to give it a more spooky look! I love it! Here is a tight shot of what it looks like:


So there you have it! Easy eyeball nails for Halloween! Again, a big thank you to Sarah at Chalkboard Nails for her awesome tutorial on this! I had a ton of fun trying it out!

What do you think of the eyeballs? What are you going as for Halloween?

LinkWithin

Related Posts Plugin for WordPress, Blogger...