Showing posts with label tutorial. Show all posts

Wednesday, March 26, 2014

OPI Sheer Tints Nail Art!

Good afternoon my fellow lacquered lovers!  Happy Wednesday to you all!  I hope you're all having a wonderful week so far.  Today, I want to share with you a super fun manicure I did last week!  When I received the OPI Sheer Tints to review, I wasn't entirely sure what to do with them.  They aren't jellies, they are just a super sheer top coat!  So when I saw an adorable layered rainbow tutorial from Adventures in Acetone, I knew I had to test it out with my own little spin.  Now, without further ado, onto the polish!


To begin with, I used two coats of OPI Solitaire from the James Bond Liquid Sand collection because I wanted a glittery base as well as being too lazy to wait for any other streaky white polish to dry.  This turned out to be an excellent choice because I LOVE how it looks!  I then began to layer them to make a rainbow by painting half of my nail one color and then painting another over the other half, so the middle third was a combination color.  

For the pointer, I used Be Magentale with Me layered with I'm Never Amberassed to make pink, orange and yellow.  For the middle finger, I started with I'm Never Amberassed and then added I Can Teal You Like Me to make yellow, green and blue.  The ring finger is I Can Teal You Like Me with Don't Violet Me Down to create blue, indigo and violet.  Lastly the pinky finger was Don't Violet Me Down and Be Magentale With Me for purple to pink, although this one had the least amount of color showing with the overlap.  I did two coats of each because I wanted the colors to be bright and not just a sheer wash.


Here are some closer up looks.  I also tried for a water color effect on my thumb by simply using the brushes in the bottles to dab the colors in different spots.


All in all, I think this is an interesting collection.  Will I use it super often?  Probably not but it's fun once in awhile to spruce up a color or change the tone.  I'm going to experiment a bit with layering over different colors to see how it changes them.  The OPI Sheer Tints collection retails for $9.00 per bottle wherever OPI is sold.

What did you think of this manicure?  Would you try it?

The products in this post were sent to me for my unbiased review. Please see my disclosure policy for more information.

Friday, December 21, 2012

Lacquered Lover's Divine Caroline Christmas Tree Nail Art Tutorial!

Good morning my fellow lacquered lovers!  Happy Friday!  I am getting ready to go away for my very first Christmas today so I thought it was fitting to share my Christmas tutorial for Divine Caroline!  I also have some amazing guest post lined up for you all over the next 10 days while I'm gone so I hope you enjoy!  Now, without further ado, on to the polish!


I love my festive (and slightly goofy) Christmas tree!  In order to find out which lovely Zoya polishes I used and how to do this cute little manicure, head over HERE to see the full tutorial!  All you need is a few polishes and a dotting tool!

What did you think of this manicure?  Any plans for the holidays?

Tuesday, December 11, 2012

Lacquered Lover's Divine Caroline Snowflake Tutorial!

Good morning my fellow lacquered lovers!  Happy Tuesday!  I hope you're all having a lovely week so far!  This morning, I just wanted to share with you a simple snow flake tutorial I did for Divine Caroline last week!  Now, without further ado, on to the polish!


I used the gorgeous KB Shimmer Snow Way! that I showed you all this weekend as a background for falling snow and just love how this came out!  To read the full tutorial, check it out HERE and be sure to check Divine Caroline later for a Hanukkah tutorial!

What did you think of this manicure?  Will you try it?

Thursday, October 25, 2012

Lacquered Lover's Divine Caroline Spiderweb Nail Art Tutorial for Halloween!

Good morning my fellow lacquered lovers!  Happy Thursday!  I apologize for the lack of posting this week but I've been a busy lady!  I have some super fun swatches coming up for you all soon (including the gorgeous OPI James Bond Collection) so stay tuned!  Today, I wanted to share with you a little Halloween tutorial I did for Divine Caroline!  Now, without further ado, on to the polish!!!


This little tutorial is so easy to do!  All you need is a base color and a striping polish (or just a polish and a very thin paint brush) and it's super easy to make this Spider Web design!  Be sure to head over to my tutorial on Divine Caroline to learn all about how to do it!

What did you think of this manicure?  What Halloween nail art is your favorite?

Wednesday, August 29, 2012

Lacquered Lover's Divine Caroline Cherry Nail Art Tutorial!

Good morning my fellow lacquered lovers!  Happy Wednesday!  I hope you're all having a lovely week.  I have a TON of fun swatches coming up for you guys (indies, glitters, magnetics, fall shades, all sorts of fun stuff) and am working on getting them written up for you!  But, to bide the time, I thought I'd share another one of the fun and easy nail art tutorials I had done for Divine Caroline!  Now, without further ado, on to the polish!


Cherries!  And they are super easy!  I love doing them as an accent rather than every finger the same!  It makes it more wearable to me!  I got so many compliments on this nail art that was so easy to do!  To find out all the colors used and how to do this manicure, head over and read the full tutorial on Divine Caroline HERE!

What did you think of this manicure?

Wednesday, August 22, 2012

Lacquered Lover's Divine Caroline Glitter Nail Polish Remover Tutorial!

Good afternoon my fellow lacquered lovers!  Happy Wednesday!  I am a busy woman these days with my new job but I have a TON of amazing swatches lined up for you guys!  All Fall colors which are my favorite so keep your eyes open for them!  But first, today I have a Divine Caroline tutorial that I wrote for you guys!  As most of you know, I wear a LOT of glitter nail polish but it can be a huge pain to remove!  So I wanted to share with you guys the tutorial I wrote up on how to remove it easily in case you didn't see my mini Instagram tutorial! 


It's my glitter claws!  To find out how this tutorial works and to see what fabulous glitter polish is underneath the tin foil, head over to Divine Caroline and read my tutorial HERE!


How do you remove glitter?

Monday, July 9, 2012

Lacquered Lover's Divine Caroline Butterly Wing Tutorial!

Good afternoon my fellow lacquered lovers!  Happy Monday!  I hope you all had a fabulous weekend!  Just a quick post today because I realized I'm behind on showing you guys the tutorials I've been doing for Divine Caroline!  The one I'm about to show you might be my favorite one yet!  Now, without further ado, on to the polish!


I love how this butterfly wing manicure came out!  (And yes, I love taking photos with my olloclip macro lens)  I was amazed how easy this was to do and really love the final product!  To learn more about this manicure and how to do it, just check out the tutorial HERE!

What did you think of this manicure?

Friday, June 15, 2012

Lacquered Lover's Divine Caroline Laser Manicure Tutorial!

Good afternoon my fellow lacquered lovers!  Happy Friday!  Just a quick post for you today to show you my Divine Caroline tutorial from last week!  Now, without further ado, on to the polish!


This week I share with you all how to do an awesome laser manicure!  I love a good tape manicure and anything that involves a matte black is great to me!  Head over HERE to find out what colors were used and how to do this fun nail art!

What did you think of this manicure?

Friday, June 8, 2012

Lacquered Lover's Divine Caroline Funky French Avon Manicure!

Good morning my fellow lacquered lovers!  Just a quick post this morning all about one of my latest posts for the website Divine Caroline!  This week in nail art tutorials I used one of my many scrap booking scissors for a tape manicure!  Now, without further ado, on to the polish!


I love how cute this funky french came out with the crafting scissors!  It helps give you a fun, funky edge to the tape to play with!  To see which colors I used and to read the full post, check it out HERE!

What did you think of this manicure?  What colors do you like for a funky french?

Thursday, May 31, 2012

Lacquered Lover's Half Moon Manicure Tutorial featuring Milani!

Good morning my fellow lacquered lovers!  Happy Thursday!  I hope you are all having a fabulous day!  Just a quick post this morning since I forgot to post this last week!  I have my latest Divine Caroline post for you all today which is a really fun Half Moon manicure featuring 3 of Milani's newest shades!  Now, without further ado, on to the polish!


I loved how this came out!  To see the full tutorial and which awesome Milani colors I used, check out my post HERE!  I will definitely be trying more of these in the future!

What did you think of this manicure?  What color combos do you like for a half moon manicure?

Friday, May 18, 2012

Lacquered Lover's Divine Caroline NARS Gradient Tutorial!

Good afternoon my fellow lacquered lovers!  Happy Friday!  Just a quick post for you this afternoon to share my newest Divine Caroline Tutorial!  When I saw the tutorial by the Nailsaurus I knew I had to give it a shot myself!  So I decided to try my own hand at it which you can find HERE.  Now, without further ado, on to the polish!


I used all polishes from the new NARS Thakoon collection and I LOVED how the orange and yellow side came out!  Unfortunately there wasn't enough of a difference between the pink and the orange to really stand out as much but I was really happy with how my first attempt came out!

What do you think of this manicure?  Are you a fan of the gradient?  Have you tried this technique yet?

Friday, May 4, 2012

Lacquered Lover's Divine Caroline Neon Leopard Print Tutorial!

Good afternoon my fellow lacquered lovers!  Happy Friday all!  I hope you all have a wonderful weekend ahead!  Today, I have something really fun in store for Fun Friday!  As many of you know, every week I write a freelance nail art tutorial for the awesome website Divine Caroline.  I decided to challenge myself last week with something I have never done which was freehand animal print!  I loved it so much I kept it on for several days!  Now, without further ado, on to the polish!


I loved it so much I kept it on for several days!  If you want to see the step by step guide on how to do this, check out my tutorial HERE.  Honestly if I can do it, anyone can!  Just takes a bit of patience!

What did you think of this manicure?  Have you tried out leopard print nails before?

Tuesday, May 1, 2012

Lacquered Lover's Divine Caroline Glitter Sponging Tutorial!

Good morning my fellow lacquered lovers!  Just a quick post to show you last week's tutorial I did for Divine Caroline!  I finally decided to try my hand and sponging and it's super easy and really fun to do!  Here is a look at the final result:


I love how subtle this is and really liked how it came out!  You can read the whole tutorial HERE and be sure to check out this weeks upcoming tutorial because it's going to be epic!

What did you think of this tutorial?  Are you a fan of glitter gradients?  What are your favorite combinations?

Thursday, April 19, 2012

Lacquered Lover's Divine Caroline Color Block Tutorial!

Good morning my fellow lacquered lovers!  Just a quick post to show you all my latest tutorial for Divine Caroline!  I already did a simple tape manicure tutorial so I wanted to do something fun a bit more complicated so what's better than the new Color Block trend for Spring?


This manicure utilized a few pinks from the new OPI Vintage Minnie Mouse Collection that I showed you all earlier this week and my new favorite silver nail polish, Stardust by Deborah Lippmann!  Check out the full tutorial HERE and let me know what you think!

Friday, April 13, 2012

Lacquered Lover's Divine Caroline Flower Tutorial!

Good morning my fellow lacquered lovers!  I hope you are all having a fabulous Friday!  Just a quick post this morning to share with you my latest nail art tutorial for the website Divine Caroline!


Essie polishes made the perfect combination for simple flowers made with bobby pins!  Check out my tutorial HERE for the polishes used and how to get this fun spring look!  Stay tuned later today for the return of the Fun Friday posts!

What do you think of this tutorial?  Is this something you would try?

Tuesday, April 10, 2012

Lacquered Lover's Divine Caroline Polka Dot Tutorial!

Good morning lacquered lovers!  I didn't get a chance to post this up last week but here is my second nail art tutorial for Divine Caroline!  If you want to learn how to do a cute spring polka dot manicure using all items you have at home (including bobby pins, wax paper and of course, nail polish) look no further!


This tutorial uses all Zoya nail polishes including Zuza, Kimber and Marley!  Check out the full tutorial HERE!

What do you think of this manicure? 

Friday, October 28, 2011

Fun Friday Featuring a Halloween Eyeball Manicure and Tutorial!

Good afternoon my fellow lacquered lovers! As Halloween is quickly approaching, I tried my hand at some Halloween nail art after my spider webs didn't quite come out perfect. My lovely friend Sarah over at the amazing blog Chalkboard Nails (which you should all be following if you aren't!) did an incredible eyeball manicure plus tutorial which you can see HERE. I decided to give it a go and see if I could recreate it so without futher ado, on to the manicure!


Yay! So fun! I actually think it came out super cute! So now, here is my sort of step-by-step version of how to do it (for a more in depth tutorial, check out Sarah's site linked above!)


First I started with a dark red cream for the background. Since I was so excited to do this manicure, I forgot to take a picture of it! The background is Nails Inc. St. Pancras. Then I took my Essie Blanc and with the corner of the brush, dotted white circles onto my nails in a polka dot pattern. I purposely did this while the red was still wet so it would bleed a bit and look like veins. Surprisingly easier than I thought it would be! Then I waited a few minutes to dry before adding the irises.


First I did the brown eyes with Essie Very Structured. I didn't want to choose any colors that were too dark so you would be able to see the black pupils eventually. I tried to put the brown in different lines on each nail so that the colors would be different on each finger.


Next came the blue eyes with Orly Frisky. Can you believe I've had this gorgeous bright blue cream sitting in my untrieds? The horror!


Last was the green eyes for which I used Color Club Twiggie. The only way to describe this shade is a neon mint green. I realize that sounds like an oxymoron but it's the only way to describe it! So after all the colored iris' are put into the eyeballs with the dotting tool, let your creation dry for a bit before going on to the pupils with a smaller dotting tool.


I used a smaller dotting tool to make the pupils. I tried to make them in the middle of the eye but that didn't quite work. Oh well, win some use some. For the pupils, I used my favorite black cream, Wet N Wild Black Creme. Lastly, I waited a few minutes before adding one last little touch:


Using a tiny dotting tool, I added a white dot like in Sarah's pictures to make the eye glow a bit. The dots are all off centered on purpose to give it a more spooky look! I love it! Here is a tight shot of what it looks like:


So there you have it! Easy eyeball nails for Halloween! Again, a big thank you to Sarah at Chalkboard Nails for her awesome tutorial on this! I had a ton of fun trying it out!

What do you think of the eyeballs? What are you going as for Halloween?

Wednesday, October 26, 2011

Halloween Spiderweb Nail Art Tutorial

Good afternoon my fellow Lacquered Lovers! Today, I have a little Halloween treat for you! My fabulous friend Jacki of Adventures in Acetone (isn't that just the cutest name?) did THIS amazing sparkly spiderweb nail art last weekend and I thought I wanted to try it (minus the sparkles!) So, thanks to Jacki's guiding hand, here is my Halloween spider web tutorial!


Well first, since this was a Halloween design, I decided to use my OPI Spookettes mini pack for one of the colors!


I went with "He's My Boo" as my base color because it's the perfect pumpkin orange! This is two coats and it's completely opaque. As far as I know, this color is only available in the mini spookettes set.


Next I took my Milani Nail Art bottle and brush in black to make lines. It was much easier to do part of a web so I started at the corners and made 3-4 lines (depending on how many could fit on my tiny fingernails) that all went at an angle from the same corner.


Next I connected the lines a bit apart so it gives the partial spiderweb effect. At first I thought it was done but something didn't feel exactly right to me so luckily Jacki told me to extend the lines to the edges of my fingers so it looked like the web kept going! So glad she told me that!


And here is my finished product! Not nearly as cute or as awesome looking as the picture I was going off of but for my second time ever using a nail art brush, not bad! It's definitely a cute look for Halloween!

Hope you all enjoyed this tutorial! Now go check out Jacki's post!

What did you all think of the tutorial? Have you done any Halloween Nail Art?

Monday, September 19, 2011

A Post by the Boyfriend - AJ's Guide to Frankening!

Good afternoon my fellow Lacquered Lovers! So after my post about cutting all my hair off this morning, I figured you guys could use a treat! So, the amazing boyfriend (or AJ as he is known in real life) decided last week that he wanted to start to "franken," or make his own polish colors! Below, he gives you a step to step guide (with pictures!) on how to do it with his newest color, In It To Win It! I hope you all enjoy his post!

~~~~~~~~~~~~~~~~~~~~~~~~~~~~~~~~~~~~~~~~~~

I stare on as the collection grows. Newer, prettier colors in bottles that come in more fun-shaped bottles with crazier applicator wands arrive by the truckload every day. Not that there's anything wrong with that, but I couldn't help but feel that there was something about the nail polish world that didn't sit well with me. It lacked something so rare, unique, precious, really really awesome, and (of course) modest. After some concerted thought, it dawned on me: there wasn't a polish that screamed, "AJ!" I hadn't applied my unique touch to the field. It wouldn't be fair to let untold millions of lacquered-fingered followers live their lives without knowing what I'm capable of. And, in all truth, what they are capable of, as well!

In this post, we will investigate the world of "frankening". Frankening is the act of creating your own unique nail polish. The pros: your nails are one of a kind, never replicated, never duplicated, and never to be found in stores. The cons: I can't think of any, either. I actually started completely on a whim. Carly had come back with a haul, or maybe had mentioned her encounters with ManGlaze, and I jumped to my feet and said, "well, if they can do it, so can I!" A few hours later, after a quick trip to Rite-Aid, we were stocked with a few ninety-nine cent bottles of base coat and a slew of glossy, shimmery, sparkly colors to make you go, "ooh" before you went, "aah". After a little experimenting, we granted ourselves Ph.D.s certifying ourselves professionals in the art of polish production. We decided to share the wealth. You lucky readers, you!

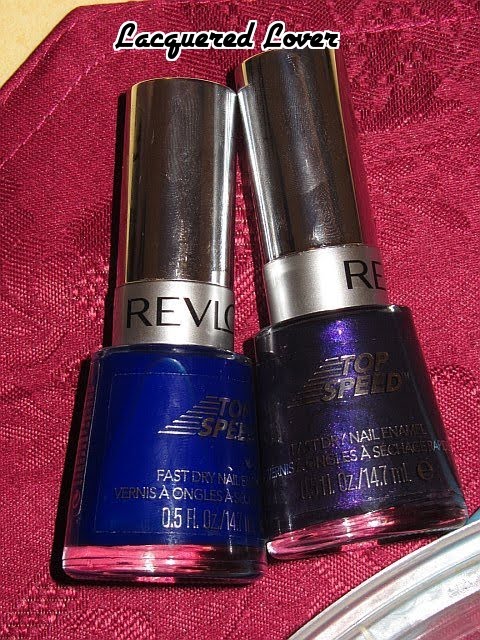
What follows is a step-by-step guide to creating your own nail polish. You will note that, in our how-to, we created a holographic color. We did so using materials that aren't necessarily "street legal", and so their mention in the process is excluded. ONLY MAKE HOLOGRAPHIC NAIL POLISH AT YOUR OWN RISK! In this tutorial, the base polish used was Revlon "60-Second Fast Dry" Grape and we used NYC base coat.

Above: Revlon Grape (on the right)

WHAT YOU'LL NEED:

bottle of discount top coat
bottle(s) of nail polish (note that the color(s) used, when mixed, may change and become brilliant! Mix a couple dollops together and try a few swatches on newspaper or nail wheels to get an idea of the color you want to make)
the SECRET INGREDIENT (for holographic nail polish)
discount eye shadow powder/palates
a plastic straw
a pair of scissors
napkins and nail polish remover (for clean-up!)


STEP ONE: Clear off the surface you want to work on and put down some napkins or newspapers that you can pour out polish onto. Be careful not to get polish on finished furniture or upholstery!
a surface to work on that can get messy

Above: Frankening Station


STEP TWO: Bend your straw in half and clip the end on a diagonal. Clip the other ends of the straw on a diagonal. You now have four pointed scoopers you can use to break up eye shadow with to add shimmer and pigment to your nail polish creation!

Above: Clip the Straw

STEP THREE: Take the polish you want to use as your base color. Pour out about one-half to two-thirds of the bottle on your newspaper or working surface. This is a great opportunity to mix polishes and play with different combinations until you get the perfect blend of awesome! Be sure to mix colors together well so you know what the final product would look like in the bottle. Pay attention to proportions -- i.e., if you use just a little bit of that sparkle to get your original polish creation just right, remember you'll have to use a little bit more than you use in your swatch to get the same distribution in the bottle.


Above: Seeing the color and pouring some out

STEP FOUR: Pour in your pigments and polishes! Using the base color bottle as the cauldron, start reciting all the lines from True Blood and Macbeth that you can remember while you whip up your new potion! Note that if you are making a holo, the best time to add the SECRET INGREDIENT is just after you pour out half of the original bottle of polish, before you start adding any new polish. Be sure to leave about one-quarter of room at the top of the bottle. You can also add the eye shadow pigment now, too, if you would like. Make sure you grind up the eye shadow so that it's as fine as possible or else your polish will get lumpy! Be careful not to overdo the eye shadow -- too much makes your polish VERY thick!


Above: Adding in pigment

STEP FIVE: Add a little top coat. You'll want to make sure your polish creation is going to be adhesive, and the clear top coat also gives you more volume without going overboard on pigment. As you use your new nail polish time and time again, you can keep your supply stocked by adding a little top coat every now and then.

Above: Pouring in Top Coat

STEP SIX: Shake, shake, shake! And just when you think you're done shaking, shake it some more! I hope I don't have to mention to make sure you've screwed the top of the bottle on very tight so you don't get polish all over you, and be sure to keep your whole hand wrapped around the nail polish bottle so it doesn't go flying out of your hand. Try rolling it between your palms to get good top-to-bottom distribution.

Above: I don't have a picture of AJ shaking but this is him working on a Franken!

STEP SEVEN: Try your new polish as a mani or pedi and make your friends jealous! You are awesome. Look at that great new color! Don't be afraid to tell everybody that you're wearing the newest, coolest polish ever made, but also be sure to tell them that they can get in on the fun, too! Send them over to Lacquered Lover and make sure you tell them to follow!

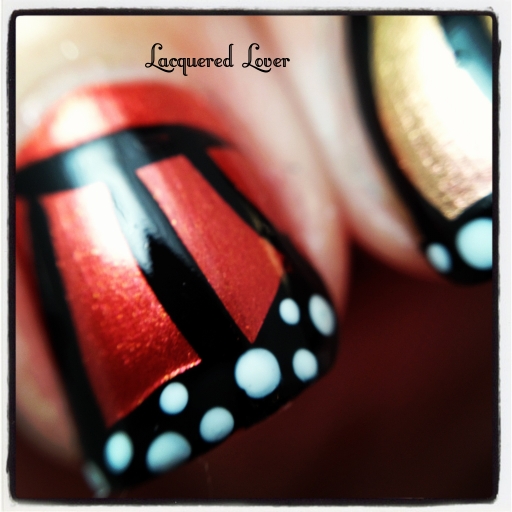
Above: AJ painted his new polish, In It To Win It, on my toes!

TIPS AND TRICKS:

If your polish is too thick, try using a little nail polish thinner.
If you don't like your polish after applying it at first, try adding a little sparkle or more color! Pour out a little of the color you don't like and try to play with the ratios.

If you end up with nail polish all over the bottle, especially under the lid or on the screw-top, be sure to clean it with nail polish remover or else you'll never be able to share your crazy new creation with anyone when it seals shut!
Revlon makes "60-Second Fast Dry" polishes that are great for holo-ing...

Have you ever made your own nail polish? Do you have any tips, tricks, or suggestions that you've discovered in the act of frankening? Any must-try combos? Be heard below!

LinkWithin

Related Posts Plugin for WordPress, Blogger...